Pairs Trade Trade of the Week
Post on: 10 Апрель, 2015 No Comment

This trade is a spread pairs trade. It’s something new that I haven’t talked about so I’ll take the time to introduce it here.
$1.24
The pairs trade may be a new concept to many visitors of this website. I know when I first heard about it, the concept challenged my thinking a little bit. I’m not a fan of using this strategy all the time but as I’ve looked at the market, I think this might be a good time to take advantage of the extreme volatility that’s out there.
The simplest way to think of the pairs trade is to consider it like an iron condor only the two spreads are on different underlying instruments. The approach is typically to pick an instrument that has relative weakness and pair it with one that has relative strength.
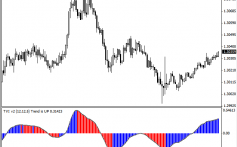
If you look at the above two charts, it will be clear that EWZ has been showing a fair amount of weakness compared to the rest of the market. Coupled with that is the SPY, which is doing OK. I was tempted to use the IWM but I already have a trade going on that ETF.
The main difference with this kind of trade as compared to a traditional iron condor is that this pairs trade has the risk that both underlying instruments could be fully ITM on expiration. I don’t think that’s likely but it could happen.
Why this strategy?
This market is currently experiencing a lot of turmoil and that has driven volatility up. This means there could be some wild swings up and down over the next few weeks to a month. This trade may appear neutral on the surface but it’s much less so than a traditional iron condor.
What I’ve seen happening over the last week or so is that on market upswings, the EWZ doesn’t move up as strongly as the other indices and when the market sells off, the EWZ will sell off harder. A pairs trade can take advantage of this by selling a call spread on the weaker index and selling a put spread on the stronger index. With the wild swings, the opportunity presents itself to close the side opposite the strong move.
For example, on a strong series of buying days, the SPY AND likely the EWZ will move up. With a strong enough move, SPY might be closed leaving just the EWZ. On the next selling spree, there may be an opportunity then to close the EWZ call spread.
It’s possible that the market could just rally up strongly off some of the lows seen today OR it could continue to sell off and completely through the put spread. The nice thing about this trade is that the risk is fairly small relative to the reward. I’ll be talking about this more in the next sections.
Choosing the right strike prices
The rules I’m following to chose the short strike prices are very similar to those used to sell credit spreads — or even a traditional iron condor for that matter. I will look for an option month having more than 20 days until expiration and I’ll look for short strike prices with a probability of expiring ITM of between 30-35%.
One thing I noticed while setting up the call spread on the EWZ is that the volatility is much higher than on the SPY. This will make the price of the call spread higher than the price of the put spread. However, the important thing is the total credit received.
For the EWZ spread, I selected the $60 call having a probability of expiring of about 35%. I bought the $62 call to make a $2 wide spread. I followed similar rules for putting on the put spread on the SPY.
The $100 put was right at about 35%. This is kind of nice because $100 could act as a psychological support level. I likewise bought the $98 put to create another $2 wide spread. The interesting thing about these trades is that the credit for the call spread on EWZ was about twice the credit for the put spread on SPY — again due to the skew in volatility.
Risk/Reward analysis
As I’m considering my reward/risk analysis, I know going into the trade that I won’t be holding the trade completely to expiration. In fact, my planned exit is to lock in 60% of the credit, much like I would for an iron condor. That being the case, I’ll calculate my reward accordingly.
I’ll exit the trade when I can lock in 60% of the $1.24 expected credit. That would mean I get to keep $.74 with a risk of about $.86 (assuming only one side of the trade expires fully ITM). In this scenario, the reward/risk ratio would be about 86%. That’s not too bad for a trade like this.
It’s worth taking a moment to examine the possibility that both spreads could expire fully ITM. That’s not too likely but it could happen. In this case, I have a total of $4 of risk ($2 for each spread) and only $1.24 credit. That means my absolute risk is $2.76. In this scenario, my reward/risk ratio is only 44%. Still not to shabby.
Position sizing
I’m going to size my position based on the possibility of having only one side be fully ITM. That means my risk is $.86. My portfolio has drawn down a little bit, currently standing at $18,307 so a 2% portfolio risk would be about $366. With $86 risk per contract, I can take 4 contracts and remain within my limits. Be aware that one downside of this kind of trade is that margin will be held on both spreads.
I wanted to take a moment here to quickly go over the trade entry for the pairs trade. There is no specific order that I’m aware of that can perform an ‘all or nothing’ order. This is the kind of trade where you’ll have to monitor the entry orders and adjust accordingly. However, you can set the order up to be entered all at once, which I’ve done here. The trick is to set the advanced order type to ‘Blast All’. This will allow entering multiple orders at once. First set up the initial order (ether the put spread or the call spread) and then select ‘Blast All’ and then add the second order.
Exit plan
With this pairs trade, I won’t be using any early exits other than the plan to close each side for 20% of the total credit. That amounts to about $.25 per side. So, just to summarize:
- I will exit each side if I can do so for about $.25 debit
- I will exit the entire spread if I can do so for $.50
Just to make sure that the first two exit rules get executed, I can place orders on each side. They won’t be OCO orders but simply two orders to close each side for $.25.
Portfolio Impact
The pairs trade I put on is initially going to be neutral in nature in that it won’t add much positive or negative delta to the portfolio. It will however add positive theta, which won’t hurt.

The above portfolio summary shows that there is a slight bullish bias that comes largely from the IWM put spread I have on. There is a fair amount of negative theta but that comes from the long call on the SPY that is the remnants of a calendar spread. In time, I may be able to sell a short call against it to pick up some more positive theta.
Update 5/27/2010
It didn’t take too long for my SPY put spread to close at the target exit price of $.25. Of course that leaves my short EWZ call spread still on and being overrun at the moment. However as I pointed out in the entry of this trade, EWZ can also make strong down moves when the market is selling off. Given that the SPY position closed so soon, I decided to add a smaller position of a put spread to keep this a kind of pairs trade.
What I did was partially rebuild my pairs trade by selling 2 contracts of a $105/103 put spread on the SPY for $.42. That adds $84 to my current target profit in the trade. Actually. I’ll be closing the trade early when I can lock in 80% of the credit. That means I’ll only potentially keep about $67. This also reduces my overall risk in the trade to roughly $.65 per contract or about $260 total.
With all the market vacillation, there may be several opportunities to trade this way. One of the key principals I’ll follow though is that I’m scaling down each time. Why? Because if I’m achieving my profit target, why risk it all with another trade, especially if the position I put the trade on isn’t as good as the previous position? My approach has been that if I add another position, I’ll usually scale back the number of contracts. If this process were to continue, I’d eventually be trading down to 1 contract and eventually out completely.
Update 6/3/2010
I went ahead and closed out the EWZ calls. It’s becoming clear that the market is establishing a direction and I believe this trade no longer makes sense.
Below is the chart of the more recent movement of EWZ. The weakness that had be evident in the past is clearly not there now and for that reason, it doesn’t make sense to be in this pairs trade — at least as a pairs trade.
I closed the 4 contracts of the EWZ call spread for a $1.58 debit. I still have the 2 contract SPY puts on so this has now become a very small credit spread trade. Let’s take a quick look at where the trade stands.
Note. In this update I initially referred to the put spread as being an IWM spread, but should have been SPY I sold the initial spread for $1.24 credit. I closed the initial SPY puts for $.24 debit and the EWZ call spread for $1.58 debit. That leaves a net loss of $.58. However I also sold a 2 contract SPY spread a little higher up than the initial spread. I put two contracts on for $.42, which is equivalent to a 4 contract spread for $.21. That leaves my net loss on the trade at $.37. I’ll probably pay back about $.09 to close the spread a little later, which will make my projected loss about $.42.
Update 6/14/2010 (closing update)
The remaining SPY position of this pairs trade closed for the target price of $.09. As outlined from the last update, this leaves my actual loss amount at $.42. Since I traded 2 contracts, my actual loss is $84.
One of the reasons I put this trade on was to introduce a new trade. While this particular pairs trade didn’t work out, they can do quite well in a more neutral market.
Trade management is everything in a trade. The rules for the particular trade strategy dictate when to get in, when to get out, how large of a position to take, how to manage the position as if it goes bad and so forth. In this case, there were two actions that helped limit the loss in this trade.
- When the initial put spread closed for the target profit price, there was still a fair amount of time left in the trade and the market was starting to show some strength. I went ahead and put on a smaller put spread higher up to add some additional premium to the position.
- When the EWZ started showing unusual strength relative to the market, it was clear that the outlook for this ETF was changing, which made this part of the trade more risky. I decided to close the position early to limit my loss on this part of the trade.
Rule # 1 — Don’t lose money.
Rule # 2 — Never forget Rule #1 (Warren Buffet)
Note: This trade discussion is for educational purposes only. I am NOT making any recommendations on the trade or the underlying stock or ETF. If you decide to follow this trade, please do so in a paper trading account. Trading options involves risk and some options strategies can result in losing more than the original amount invested.
thinkorswim, Division of TD Ameritrade, Inc. and Success With Options are separate, unaffiliated companies and are not responsible for each other’s services and products.