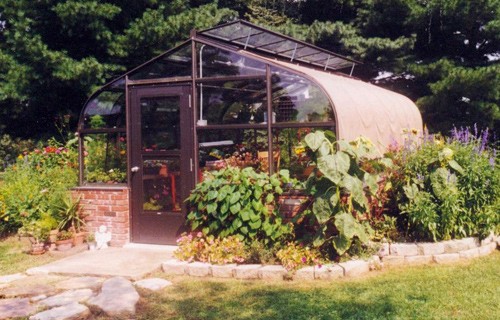
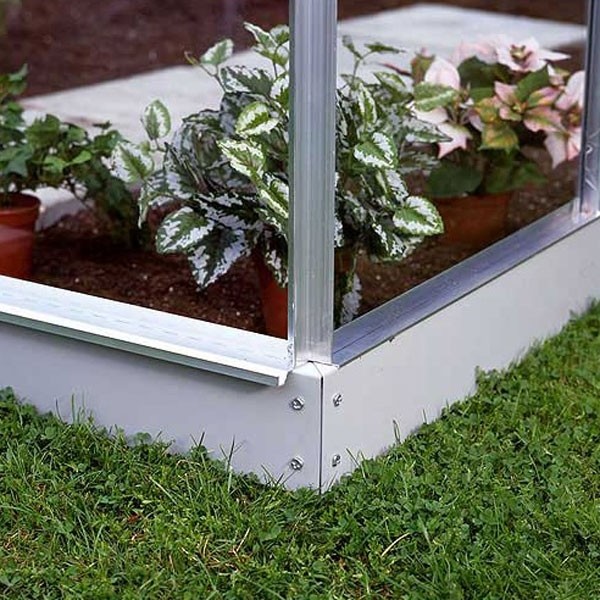
Freestanding Greenhouse Foundations
Post on: 16 Март, 2015 No Comment

Orientation and Siting
The best greenhouse sites have maximum exposure to sunlight from dawn to dusk. Capturing the most light and warmth possible is very important for spring, fall and winter growing. Make sure that evergreen trees, buildings, or hills don’t block the sun from your greenhouse. The most critical time for clear exposure to the sun is during the fall and winter months when the sun is low in the southern sky. At this time of year, when days are short, it’s especially critical for plants to receive sunlight. The ridge of your greenhouse should be on an east/west axis in order to transmit maximum winter sunlight to your plants.
Consider the low angle of the sun at this time of year when you’re choosing a site. Ideally, the roof of your greenhouse should face within 15 degrees of true solar south. You can use a compass to establish magnetic south, and then make the adjustment for your geographical location to get true south. (Seek help at your local library if you aren’t sure.) If site restrictions limit placing your greenhouse in the optimum southerly direction, site your greenhouse as close to south as possible.
The permeability of your soil is another important consideration for siting the greenhouse. If your soil is primarily sand or gravel and drains quickly, you’re all set.
However, if your soil is heavy or if your yard collects water from higher ground, you’ll need to make grade adjustments so water drains away from your greenhouse. You can also install a perimeter drain around the outside of the greenhouse to wick water away. Having a soggy floor or saturated growing beds will be frustrating, so taking a little extra time now will be well worth it in the long run.
You should also give some thought to electrical and water services. Having a water supply at the greenhouse is convenient but not absolutely necessary. A steel or plastic drum filled with water can be an adequate water supply, especially during cold months when above ground water supplies can freeze. If you want to have a sink or irrigation system in the greenhouse, you’ll probably want to put in a permanent underground water supply line.
When considering electrical needs, think about the accessories you might use such as space heaters, heating cables, lights, and fans. If you’re planning to use your greenhouse through the summer, you may need to augment the passive cooling system with an exhaust fan. Most fans, lights and soil heating cables run on 110v circuits, but a large BTU output electric space heater will require a 220v circuit. Unless you have electrical experience yourself, please consult an electrician to ensure your electrical needs are met safely.
PREPARING THE FOUNDATION
Creating a level and square base is the most important step to successfully assemble your greenhouse. Selecting a site that is already quite level will make the assembly process much easier. Please take your time with this step. There are many different ways to construct a foundation for your greenhouse. But whichever method you choose, your foundation must provide the following:
1. A firm anchor for the greenhouse frame. Because the greenhouse is a lightweight structure, it must be firmly anchored to the ground to keep it secure during high winds.
2. An absolutely level base for the frame. Otherwise the panels will not fit into the frame correctly.
The foundation you choose will depend on your soil type, the amount of slope in your yard, the climate, and how much time and effort you want to invest. Since the Northern Light Greenhouse is lightweight, it’s possible to let it float on top of the ground without any harm from frost heaves.
Two of the most common choices for foundations are landscape timbers and concrete slabs.
If you decide to pour a slab, it should be poured on a properly prepared surface and the slab should have a drain in it to prevent water from pooling inside. If placing the greenhouse on a concrete slab, you will need to leave holes in the slab for anchoring bolts, or plan to drill holes for masonry bolts after the cement sets. We recommend placing a wood sill on top of the slab on which the greenhouse can be anchored. If you do not have experience with slab construction, please consult a local contractor before you begin.
Anchoring the greenhouse to a wood frame foundation is the simplest method. This frame can float on the ground and no other foundation is needed. If you live in a very cold climate, you may want to insulate around the outside of the greenhouse by digging a 2′ to 3′ deep trench and placing rigid foam insulation against the floor area. This will prevent heat loss from the greenhouse laterally through the soil. This is also the time to install a perimeter drain around the outside of the greenhouse. Use perforated drainage pipe, filter fabric and gravel to ensure a good, permanent drainage way.
For a wood frame foundation, we recommend using 4 x 4 or 6 x 6 rot resistant timbers. Pressure treated lumber is readily available and lasts a long time. If you are concerned about the chemicals in pressure treated wood, we suggest using naturally resistant woods such as cedar, redwood, cypress or locust. Consult a lumber yard or sawmill for availability of these woods in your area.
DIMENSIONS
Make your foundation to these dimensions for Northern Light Greenhouses:
10 x 12: 9′ 9 W x 12′ 7 L
10 x 16: 9′ 9 W x 16′ 9-5/8 L
4′ Ext: 9′ 9 W x 51′ 5/8 L
12′ Ext: 9′ 9 W x 12′ 6 L
SQUARING UP THE FOUNDATION

Square-up the foundation by taking diagonal measurements. Adjust the greenhouse base so the length of the two diagonals are not more than 1/4 apart. Then check the base so it is level with a four foot builder’s level.
The greenhouse base and frame need to be perfectly level and square for the panels to fit properly. This is a critical step, so take the time now to make any necessary adjustments.
Next, the foundation must be firmly anchored to the ground. The large surface area of the greenhouse will catch a lot of wind and the weight of the wood frame alone will not be enough to hold it down.
Using 1/2 steel reinforcing rods work well to anchor the wooden base securely. Once you have leveled and squared the base, drill 1/2 holes through the top of the timbers about every 2′. Cut the steel rods into three foot lengths (some lumber yards will do this for you) and drive these 3′ pieces through the wood base and into the ground until the top of the rod is even with the top of the base. If your ground is rocky or otherwise difficult to penetrate, the rods can be cut as much as a foot shorter and will still provide adequate holding power.
SELECTING A FLOOR SURFACE
Now that your greenhouse base is complete, it is time to consider what type of floor to put down. The floor can be installed after the greenhouse is built, but it is much easier to do beforehand.
There are many interior floor surfaces to choose from. They include, but are not limited to, concrete, brick and gravel. The floor surface you choose will depend on your soil type, drainage capability, and what you intend to grow in your new greenhouse.
Concrete provides a smooth walking surface, is easy to clean, reflects light and provides good heat storage. Another advantage: concrete makes it easier to isolate the greenhouse environment from soil-borne insects and diseases. This may be very important if you will be growing exotic orchids and less important if you will be growing annual flower and vegetable plants. If you choose concrete flooring, be sure to include adequate drainage in your plans. Install a central drain in the pad. You’ll also need to decide how to attach the greenhouse to the slab. In most cases, you will want to put a wood frame on top of the slab and bolt the greenhouse to the wood frame. Again, if you do not have experience working with concrete, please have a local contractor evaluate your site and your plans.
Brick or stone on a layer of sand also makes a very practical and attractive floor. A layer of plastic under the sand will prevent the bricks and sand from sinking into the soil in addition to acting as a barrier to weeds. Poking holes in the plastic will allow water to drain and you may consider installing a perimeter drain to prevent the greenhouse floor from becoming soggy.
A floor of crushed gravel is probably the most common choice for a home greenhouse. This floor choice is inexpensive and easy to install. Again, drainage is important! If your greenhouse is not well drained, make sure you take proper steps to prevent water from collecting in the greenhouse. As with the brick floor, it’s a good idea to put a layer of plastic or landscape cloth under the gravel. If you are interested in solar collection, dig out the soil 6-12 before filling with the gravel. This will provide a heat sink for absorbing the sun’s rays.
Now that your wood base is completely level and square and your floor is in place, you are ready to begin assembling the greenhouse.
If you have questions or need assistance along the way, please call our technical service staff at 800-688-5510 or e-mail us at: info@gardeners.com.


