Broken Wing Butterfly vs Credit Spreads Condors Options Videos
Post on: 7 Апрель, 2015 No Comment
Details
Broken Wing Butterfly Options vs Credit Spreads & Condors
Video Transcript
Hi there everybody! This is Morris from San Jose Options. Today, we’re going to be talking about how to make the trend your friend and we’ll be looking at some of the traditional option strategies and how they face difficult times when the market does trend for a number of months. We’ll look at some of those typical adjustments strategies and make sure that you’re aware of the risk that you’re taking on when you’re working with somebody whose traditional strategy is that people consider to be mutual.
In a trending market, many income traders using traditional strategies like credit spreads and condors tend to face difficult time. The condor trader will end up each month pass the short strike and they force to take huge losses or the breakeven if they’re good at adjusting. Credit spread traders may attempt to roll out farther in time and farther out the money only to find the same thing happen the next month. This adjustment process can quickly take you out of the game forever. There are other trades, however, that shine while traditional strategies fade away behind the seams, the broken wing butterfly. I’ll get into that in a second. But first, let’s look at the credit spread and the condor style during a trending market.
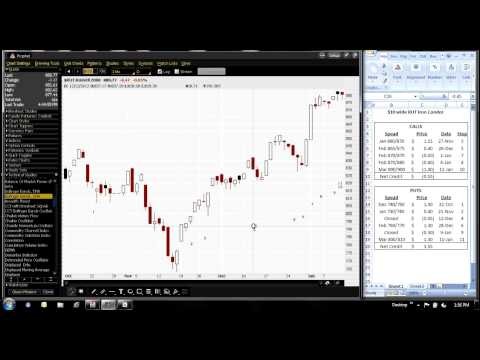
So here we have a picture, a risk profile of a credit spread. This one here is constructed using close to a 10 delta. On the call side, we’re looking at the Russell 2000 and this would be a pretty traditional, standard type of bear call spread. The goal here would be to collect this premium right here while risking all of this amount. So you could see you’re risking, in this case, over the $9,000 and possibly going to make about 5-600. Those numbers are off the screen right now so you can’t see them. You can see them over here. You’re looking at your maximum. These represent the breakeven. So if you stay below anywhere this direction, below, then you’ll keep your credit. But if you end up on this side of your breakeven right here, then you can actually lose all of this amount which is way down here which is over $9,000. This is what people consider to be a high probability trade and usually these could be 80%, 85% probability. However, when you’re trading these in a trading market, you’ll notice this is only a 5%. In our software, this red line is 5% and then you have 10% way over here. Once this market really starts to trend, 5% is nothing. We move sometimes 10% in a month is where trending, say you’re looking at ending up over here.
For example, let’s bring in the price chart. Now we’re actually looking at just the last month. So notice, from here you’re around the 960 level on June 25th and now up here July 26th worth almost 1050. You have just about a 100-point move. So you could see right here we have about a 10% move just in the last 30 days. You have another tremendous move from this point to this point. Here you have a bit of a sideways market but you cans see how often, when this market is really trending, you can see. These are all 5-10% moves over and over and over again for the last 7-8 months.
So when we’re looking at the risk profile, you’re going to see 5% is right here and then 10’s over here. So all of these trades, those who’ve been trying to work with this bear call spread the last 8 months, every single one of them has been problematic. And then typically, what people do with this type of trade for an adjustment is, let’s say the market move this way and then it gets close to expiration, s they might a couple days left. Let’s say you’re sort of in this zone. At that point, you’re just hoping the market retraces a little so you can end up over here and then “boom,” make your 10% on average. What happens is that you’ll end up in this area but then once you’re in a trending market, you’re looking at ending up on this side and having just as tremendous loss. You can see down here that’s, it’s just impossible to overcome.
What people are typically doing is when they get down to, let’s say, a few days to go, then some of the traders will gamble and they’ll j,” they just hold their breath and wait and see what happens. If it comes back this way then, “whew,” they make the small amount here. But then, as soon as they’re wrong, “boom,” they just, they can lose an awful lot.
Then you have another type of trader who, when they get down to this zone and there’s so much time left, then they take this whole trade, so you have a short contract here and a long contract here, they take these two trades and then they roll them out farther in time. So they might go out another, let’s say, 30 days for example. But if you look at the design of this trade, notice that you only have about, in this case, less than 5% move in a month. And then when you look at this chart—So, for example, let’s just look at this chart maybe since the beginning of the year. So we’ve gone up from 830 to 1050. You’re looking at 220 points divided by, get me started at the 830. So that’s a 26% move. And we’re just completing what we haven’t completed in 7 months yet but almost. If you divide it by 7, it’s about 4%. So we’ve been averaging in this trend about 4% every month. So if you come back over here, and then you look at the 4%, it’s really close to this line ‘cause this is 5%. The 4% is really, it’s almost right at this point. If you look at this, again the, you’re general public to trade options, they consider this to be really high probability. But you can see, when you’re in a trending market, in this case the Russell, if it’s averaging 4% a month and then you look at the trade set-up, 4% brings you right here, I think you can right away, I mean on average, you could say that, especially if you don’t have any other adjustment plan except for the probability because a lot of people just try to go by that mathematical probability. That’s one thing we focus a lot on the course is we talk about, although mathematically, you have that probability but look what’s involved, look at the risks involved within that 80% or 85% probability. I mean, tremendous risk.
Once you actually factor in the risk, and if you, for example, eliminate this part of the probability, see most of this is just very risky. So if you keep this part of it, the safe part, the probability in these trades is only about 35-40%. And that’s very important to understand. With the credit spread and the condor, you’re looking at somewhere between maybe 35-45%: what I call a realistic probability, the comfort zone, the safe zone. So those types of trades, they’re getting very low probability nice you consider the risk. At least half of the probability is in this zone which is extremely risky and not safe to be in. What I do is when I look at probability and trades, I just X this part out because to me it doesn’t make sense to include that, all that risk, in my probability. I like to look at more of a safe probability what might the probs are when I could be in the trade safely.
Back to this concept, you can see in the trending market that on each month you’re looking at ending up at that spot. So you can see with the trying to guess when this market’s going to reverse. A lot of people trade that way. They encounter trend traders, they see some technical and they think that the market’s going to reverse. They start to put on these bear call spreads. But then one of their wrong month after month after month, which is going on a lot lately. A lot of people have been trying to call the upside and then they put on this type of trade and then this is what happens. So typically, trending market, you’re looking at ending up here every single month with this trade. Now if you look at the risk profile, not such tremendous loss. Right in here, you’re like 50%, you can see. This amount here, oftentimes, could be somewhere between 5 and 15% depending on what deltas you used. But you can say on average, in a trending market, you’re looking at somewhere in the middle here just a tremendous loss. Like your investment on this trade could be around here 9-10,000 and then you’re looking at averaging $5,000 loss per month. Even if you, then again, roll this out, roll this out month after month, with that adjustment process and just putting the trade back on with the same amount of money, you can see that within 7 months, you could be down about $35,000. When you get one right, you’re only looking at about $700-800 profit.
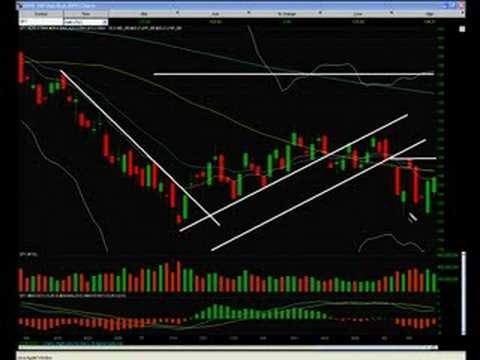
That’s what happens when your credit spread trader and the market starts to trend. The same thing goes with the condor. The condor really, it just has the other side. It looks kind of like that and the difference is is that it comes down a little bit here on this side too. So now you have the double sided risk and then your bar starts up a little bit higher since you’re selling the credit on both sides. But the same thing could happen. If you’re in a trending market, again, on average you’re ending up on this location. So there’s obviously ways to adjust. You can certainly try to sell more in this side and bring in more credit and lower that down and bring this side up. But typically, when you apply your adjustments, you’re lowering the bar, what I call it, lowering the bar over and over and then at the end of the month, like I said, if you’re lucky you’ll breakeven or not lose too much. But again, once you’re in this trending market, then again, this is very similar to the credit spread – it has the same type of problem. And then if you, again, do it over and over and over 7 months in a row, then you could just find yourself in a lot of problems.
One great solution to trending market is a broken wing butterfly. This strategy has been around for a long time but for some reason, it’s considered kind of obscure. I’m not really sure why but I was drawn into this strategy nearly a decade ago and we’ve really been perfecting it over the years. It’s just a very flexible strategy. There’s so much you could do with it. There’s so many variations and it’s the type of strategy that when your credit spread and your condor wind down each month and they’re just ready to lose so much money, the broken wing butterfly is actually in the opposite position and ready just to capitalize on that 5% move and make a lot. Let me give you just a basic sketch of it.
Back over here, the way the broken wing butterfly looks, instead of having this area, you actually have an area that comes up over here and then it goes down like this. This part will usually start lower. So, it’s a different structure but what happens is as you’re in a trending market and you can see the underlying news bout that 4-5% every month. With this type of trade, you end up where you have a great chance to the very handsome return where the credit spread and condor trader could be losing up to 50% each month, on average. But this one, like in this point, I mean it could be the exact opposite. You could have a chance to make 50% on a month. It happens, not all the time obviously, but you have that opportunity just by the trade set-up.
There’s so many ways you can set this up and they do have different characteristics. We go through all of that in the course. But typically, you’re buying here, you’re selling here, you’re buying here and then there’s different ratios depending on the widths, the strikes you choose. All of that, again, the widths and the strikes, all of that, makes a difference on the trades. So there’s really an infinite way to set these up. But that’s the general idea in how this type of trade, again broken wing butterfly we call it BWB. What’s so great about it is again, in trending market, you just let the market come to you instead of trying to force a trade with a very poor structure and a lot of risks. This trade set-up has a lot less risk and has a much better profit potential. The other nice thing about it is, again, you have limited risk on the left side. If the market finally does decide to pull back, then the way that it’s structured, like you see over here, then you really have your safety built in from the beginning of this trade for the down side protection. It’s nice. You have a lot of upside potential and a lot of built in protection to the downside.
The last thing that I’ll talk about, again with our software, we actually build in this strategy into it so we have scanners for them. We have proprietary signals that help you know exactly when to enter, when to exit, what product to trade it on, things like that. since it is a very important part of our course, it’s also become a very important part of our software. So we really help you find the best opportunities and also the software helps you know how to adjust them and everything.
Thank you for watching our demonstration. I hope that it gives you some ideas if you’re serious about learning all the new options about Option trading and advance strategies. Please feel free to give us a call over at San Jose Options and just go to our website, sjotptions.com, and we hope to hear from you soon.


